Documentation
This page is under construction. Please come back for more information.
For a list of short video tutorials, you can click here .
If you have any trouble with this plugin, please see the trouble shooting page .
You can see the release note here .
Detailed documentation on the new template mechanism can be found here.
Detailed documentation on the database templates mechanism can be found here.
Create Similar class
This may be the most useful feature of this plugin. With this you can create similar classes, from FooDAO to FooService and FooService to FooAction. To use this feature youss need to configure it by going to Windows -> Preference ->Fast Code Preference. Here is a screenshot. As one can see the it starts with a "From Classes" box. It is of the form (${ANY_PACKAGE}).dao.(${ANY_CLASS})DAO. Who is familar with regular expressions in java will have no problem to see the structure. It has been grouped using parenthesis. These groups can be used in the later parts of the configuration, especially "To Classes" field. Here you can use place holders e.g. ${1}, ${2} . It is to be noted that ${ANY_PACKAGE} and ${ANY_CLASS} are kind of reserved expressions, the '$' in ${ANY_PACKAGE} does not have the usual meaning of regular expression.
Typically, one would start from a DAO interface, e.g FooDAO. From this interface, you can create FooService and its implemenation FooServiceImpl . Then you can create configuration files as well. Certain types configurations come out of the box. Theses are spring, dozer, tiles, struts, etc. If you do not need these or need some other kind of configurations, you can open the jar file and edit the file org/fastcode/util/fast-code-config.xml. To any developer format of the file should be self explanatory. It is important to note that more than one configuration files can be created. This is especially useful for resource bundle typically required in web applications using struts or similar frameworks.
When you create a similar class, you can also copy all the public methods. It is recommended that you start with FooDAO interface, then create FooService & FooServiceImpl with this plugin and also create FooAction along with the configuration files.
One can copy the methods from the source class to the destination class. One can put some filters on the name of the methods to be copied. One can also copy one method only. To do this, one has to open the source class in editor, highlight any method name and from the top menu click Fast Code --> Create Similar Class. There is keyboard shortcuts (Ctl-Alt-Shift-S ) available for this. The plugin will copy only the method highlighted.sss
The create similar class can be used for value beans as well. In this case, 'Copy Fields' checkbox need to be checked.
In summary, plugin helps create similar class as shown in the following diagram:
-
com.abc.dao.FooDAO (Assume one already has this)
-
com.abc.dao.impl.FooDAOImpl (Assume one already has this)
-
com.abc.service.FooService (Can be created this with the plugin )
-
com.abc.service.impl.FooServiceImpl (Can be created this with the plugin )
-
com.abc.ui.action.FooAction ( Can be created this with the plugin )
-
com.abc.domain.FooPOJO (Assume you already have this)
-
com.abc.service.domain.FooVO ( Can be created with the plugin)
-
com.abc.ui.bean.domain.FooBean ( Can be created with the plugin)
-
Various configuration file skeleton (struts-config.xml, faces-config.xml, dozer-mapping.xml, Application.properties, etc) ( Can be created with the plugin )
It is possible to add pre defined code snippet in the class body. To do this you need to put the code in the text box for inside the class body in the preferences. E.g, one can put
-
private static Logger logger = Logger.getLogger(${class_name}.class);
and it will create the logger field with appropriate initializer. One can configure it to implement any interface, e.g the DAO impl class can implement InitializingBean, or a Vo class can implement Serializable. To do this, populate the 'Interfaces To Implement' list box, e.g. if one puts 'org.springframework.beans.factory.InitializingBean` the implementation class will implement the interface and the mehods in the interface (afterPropertiesSet in this case) will be copied. One can put code snippet in this method as well. To do this go to Windows -> Preference ->Fast Code Preference->Template preference Additional as shown below. With the code beow, it will automatically create the method afterPropertiesSet with code to check that all fields have been properly initialized. It is to be noted that just by populating the list box, it will not automatically implement all the interfaces, it will give the user a choice when the program is run. In other words, they become candidates for interfaces to implement.

The template for a method body for InitializingBean is already there as shown above. To create the template for any other method, you need to open the jar file. In the resources folder there is an file called additional-templates-config.xml which you can edit. Once the file has been updated, one can edit the template from the preferences. The template need to have an type attribute which is of the form "method.body.method_name", where method_name can be the just the name of the method or one can put the fully qualified class name and the method name, e.g. it will be 'method.body.org.springframework.beans.factory.InitializingBean.afterPropertiesSet' or 'method.body.afterPropertiesSet'. It is better to use the long version as there will less chance of conflict.
One can create additional fields as well. When the service class is being created, one might want to create other DAO fields in addition to the one automatically created (e.g. FooDao for FooService). To do this check the "Create Additional Fields" checkbox as shown below :
![]()
If one puts *Dao in the text box below the checkbox, it will open the type dialog with classes ending with Dao. One can now select as many Dao classes as possible, and it will create the fields in the ServiceImpl class.
One can also import certain classes. What kind of classes should be considered for import? If there are some classes with constant fields, or some utility classes, one might consider importing them. Again by configuring does not mean they will be automatically imported but they become candidates for import. The user will be still able to pick and choose which files to import. This also supports wildcard feature, e.g.if one wants to consider to import all classes in the package com.test.util, one needs to put com.test.util.*. When one executes the option, all classes in the package will show up in a list box from which the user can choose which classes to import.
It is possible to convert the method parameters while doing Create Similar Class, e.g. if the DAO class has a method
-
public void saveFoo(FooVo fooVo );
and one wants the Service class to have
-
public void saveFoo(FooDto fooDto );

It is also possible to have code convert one object to another (from fooVo to fooDto in this case). To do this, one can put a code snippet in the Convert Method Param Pattern text box in Fast Code preference as shown below :

In the above example it is shown how to convert one object to another using the dozer mapping. To do other kind of conversion is straightforward.
One useful feature of the plugin is 'Create Similar Class with Different Name'. This is particularly useful to create similar classes of the same type, i.e. one DAO to another DAO or one service to another service. With this action one can create FooDAO to BarDAO with click of a mouse. As usual, if the FooDAO is an interface, you can create BarDAO interface along with the implementation class. You can copy the methods as well, but this time with a catch, method names are converted, e.g methods with name getFoo, saveFoo etc will be converted to getBar, saveBar etc. It will try to convert the method parameter as much as possible. E.g. for the method saveFoo(FooVO FooVO), it will create saveBar(BarVO barVO) provided it can find the BarVO class. To convert the method parameter in this case, one must have convert Method Param CheckBox checked and configure it accordingly in the 'Create Similar Class with Different Name' preference as shown above. To use this, highlight a method or the class and type Ctl-Alt-Shift-D or choose the option Create Similar Class with Different Name from the fast code menu.
All the create similar features can be invoked from the implementation classes even though it is configured with the interfaces. This way one does not have jump to the interface just for creating similar classes.
Create new class
One can create a DAO or Service as interface-implemenation pair. To do this one needs to select Create New Dao or Service class from the fast code menu. Once selected, it will prompt one with an input box. At this time, one can put any alpha numeric values (space separeted). If one types in foo, it will create FooDao and FooDaoImpl in approppriate packages and their configurations. To configure this one needs to go to Windows -> Preference ->Fast Code Preference-Create New Fast Code Preferences->Create New DAO Preferences. Configuration is very similar to create similar configuration except that there is no From classes box as there are the no from classes to start with. You need to configure it just once and use the feature many times. The menu is show below :
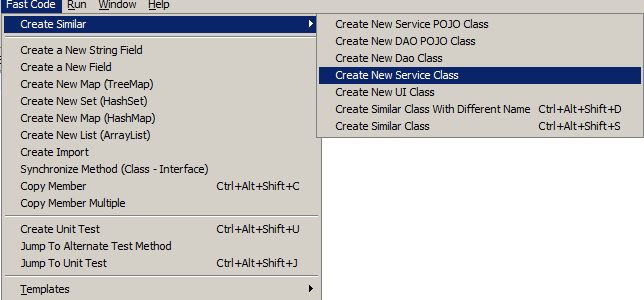
The preference path is shown below :

As one can see it has a special keyword called input which is what the user enters as he is prompted. If one types in foo it will generate FooDao and FooDaoImpl. Before using it is necessary to configure it including the project and package. It is also possible to create value objects e.g. FooVO or FooDto. One can create fields in the class such as FooName or FooType by including code in the class as private String ${input}Name and such.
The ${input} is a special object which all the necessary methods from the String class in java. However, it is not possible check for equality with other string. To check for equality with other string one has to use ${input.value}. It is explained in the code block below. Otherwise, one can put any arbitrary code snippet with ${input} variable and use inside class body or annotations, etc.
    #if (${input} == "foo") {   // Do not do this.
	   // some code
	}

    #if (${input.value} == "foo") {   // Do do this.
	   // some code
	}
CODE Templates
New feature in the latest version is the template mechanism. It extends eclipse code templates mechanism by being able to generate code snippet with multiple fields. This kind of snippets are needed in various scenerios, e.g. create instance of a java bean and populate the bean, create jsp fragments, copy one java bean to another, create dozer mapping between two classes, create hql for hibernate queries, etc. This plugin provides a very intuitive interface by allowing the user select a class and then select the fields within the class. More detailed description is provided here.
The templates can be invoked from the fast code menu. But it is always more convenient to use the keyboard shortcut (Ctl-Alt-Shift-T).DATABASE Templates
New feature in the latest version is the template mechanism with database tables. It extends eclipse code templates mechanism by being able to generate code snippet with multiple columns. This kind of snippets are needed in various scenerios, e.g. create sql statements, with Named paramenter, Named query or just a simple query, etc. This plugin provides a very intuitive interface by allowing the user select a table and then select the columns from that table. More detailed description is provided here.
The database templates can be invoked from the fast code menu. But it is always more convenient to use the keyboard shortcut (Ctl-Alt-Shift-B).
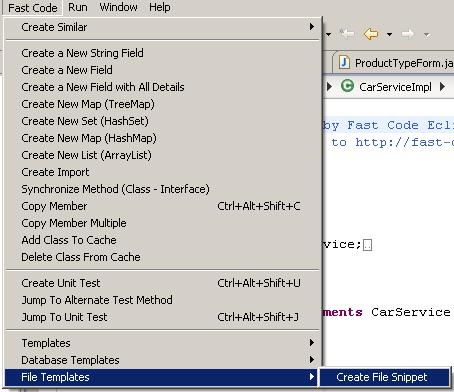
File base Templates
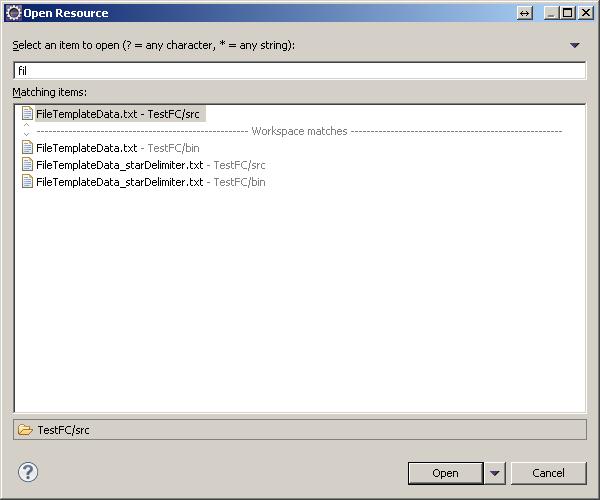
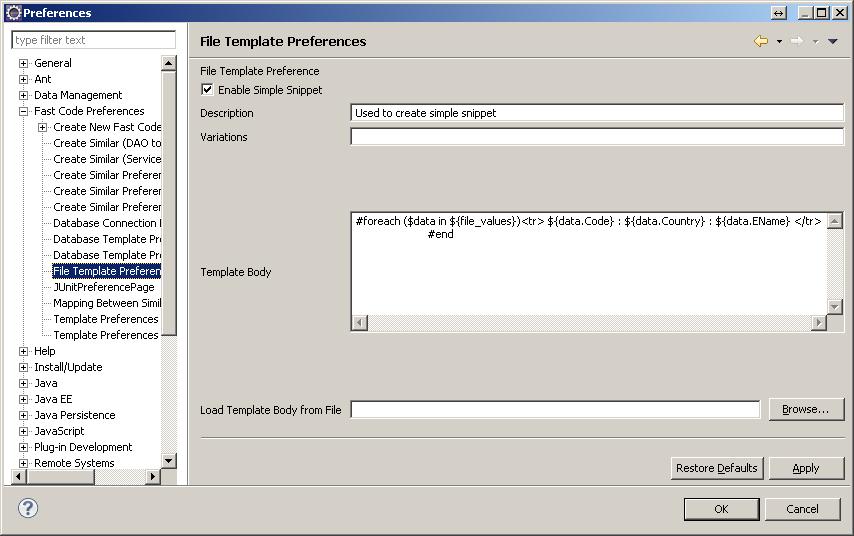
This is useful to create code snippets with data from text files. It extends eclipse code templates mechanism by being able to generate code snippet with delimited data. The user can choose the desired text file.The user can specify the delimiter in the properties file located at resource->fastcode.properties. The code presents the data in a Map for, with the headers and the values. The template can be suitably edited to get the output in the desired format. It is assumed that any line in the file starting with ## is a comment line, and these lines will be ignored. Lines starting with # is considered to be the header.
For instace if the file contents look like something below:
##country name details
#Code Country EName
IN INDIA Delhi
US USA Washington D.C
The output would look like:
<tr> IN : INDIA : Delhi </tr>
<tr> US : UnitedStates : Washington D.C </tr>
JUMPing between Similar classES
An useful feature of this plugin is the ability to jump between similar class, e.g FooDAO to FooService, FooService to FooAction, etc. To use this feature, one needs to configure this first. To configure, please go to Windows -> Preferences ->Fast Code Preferences -> Mapping Btween Similar Classes. This is very similar to the configuration for create similar classes.
Dependency injection
Another useful feature of this plugin is easy dependency injection. Let us say one has class SampleServiceImpl which needs to have FooDao and BarDao as dependencies. Instead of manually creating an instance of the Dao classes and their getter/setters with their configurations, this plugin has feature that enables one to select FooDao and BarDao in the package explorer and click Fast Code -> Add As Spring Dependency. In one click it will create instances of FooDao and BarDao with the imports and the getter/setters. It will also update the configuration file. It is also possible to just create the instances without configuration. To do this just click Fast Code -> Create Dependency. This helps when one is using the spring's auto-inject feature or is not using the spring framework at all. With this plugin one can create simple (without configuration) of complex dependency injection of any number classes in one click.
Copy Member
With this plugin, one can create copies of members (class/fields/methods) in a class or interface. This come very convenient in large class. Let's say you want to create from field fooName to fooType and fooAge. To do this you select fooName and right click on it and navigate to Fast Code -> Copy Member menu or type Ctl-Alt-Shift-C . A simple dialog box will appear to prompt you to input. Here you just type Type and Age. You will see two new fields with name fooType and fooAge will be created. If the original field (fooName) had getter/setters the new fields will be created with getter/setters as well. If the original field had only getter or setter the new fields will also have only getter or setter. However, in the preferences, one can set the preference to always create getter/setters regardless whether the original fields has it or not, but it is not recommended. Similarly one can create copies of methods as well. One can, of course, select the full name of the field/method. One can copy a class as well. If one has action class called FooAction, one can create a BarAction. To do this, just highlight Foo and then type Ctl-Alt-Shift-C. Once a input dialog comes asking for input where one can type bar and BarAction will be crated. If FooAction had a super class and implemented some interfaces it will ask if one want to extend the same super class and implement the interfaces for BarAction as well.
create new field with Details
This menu is a one stop point for creating any kind of variable in a java or groovy class. The user can specify if they want getter/setter both, just getter or setter or none. If they choose List or Set, they have an option for getter/adder also. User can specify format for getter setters and a prefix for setter method. These once set will be appplicable for variables created from any other fast code menu as well. They can always change it from this menu. If one wants to use Lombok annotation, they can do so, if they have the lombok jar in the project class path. User can create variables of primitive types, or defined types—this they can do by choosing the available classes displayed, when the browse button is clicked. If user wants to use wrapper class for the primitive types, the can do so by checking the ‘change to wrapper’ check box. User can specify the desired access specifier modifier. Accordingly, the getter/setters will be enabled or disabled.
Sample code generated:
-
With private List, getter/setter –single line, prefix – b
- private List<Sample> sampleList = new ArrayList<Sample>();
- public List<Sample> getSampleList() {return this.sampleList;}
- public void setSampleList(final List<Sample> bSampleList) { this.sampleList = bSampleList;}
- @Getter @Setter private String lomTest1;
- @Getter (AccessLevel.PROTECTED) private Date lomTest2;
With lombok jar
create list/map etc
This plugin helps create code snippet to create List/Map/Set etc. This is especially useful for parameterized list. E.g, we want to create a List of class Foo as :
-
List<Foo> fooList = new ArrayList<Foo>();
As one can see there is so much typing involved although any ide's code assists feature help. With this plugin one can generate the whole line with one click along with all the necessary imports. As an added benefit, it will also prompt you to create getter/setters or adder methods as well as shown below.

Create New variables with getter/setter
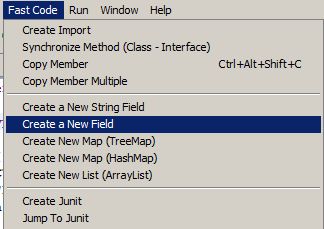
This plugin make it easy to create private variables in a class. To use this simply choose 'Create a New Field ' from the menu at the top as shown below. This brings up a type dialog where you can find and select your type. When you have put a name or multiple names for the variable. Also if one can create a bunch of fields in one shot. One can also create new variable of type string by choosing a different option 'Create a New String Field with getter/setter' from the same menu. This will by-pass the type dialog, everything else will be same. These two mwnu create the field with getter and setter by default. If user wants to create fields with specific details, then they can use the menu 'Create new field with Detail'
create import
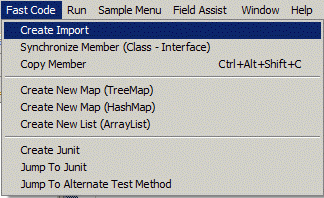
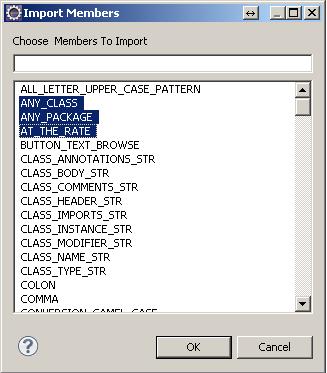
Another useful feature of this plugin is to create import. Normally, one would not need to have another method to import files as eclipse already provides importing functionality. This plugin helps to create static import easily. If the class to be imported has static members only it can automatically create static import. All the static members form the chosen class are displayed to the user. The user can specifically choose the static members to be imported. As always, this feature is configurable.
create unit Test
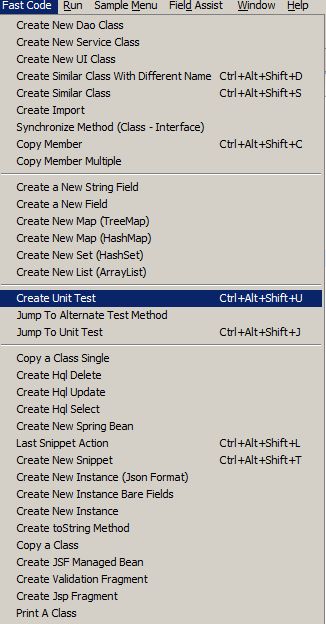
A very useful feature of this plugin is to create unit tests automatically. Unit tests can be of type Junit 3, Junit 4 or TestNG. For Junit 4 or TestNG tests, appropriate annotations will be automatically added. One needs to configure it just once. One can setup test profiles as well, e.g. DAO classes can have one kind of unit test and the service classes can have another. One can select the class or any method and from the Fast Code menu select Create Unit Test or type Ctl-Alt-Shift-U. If a method is selected then unit test dailog box will be displayed with the details applicable for that method only, otherwise all the methods in that class, for which there is no test method yet, are displayed. And one can select any number of methods. If the unit test is already present, it will prompt the user to create another test, or jump to test. If the method chosen already has a test method then user can create an additonal test method. If the method does not throw any exception, user can choose any Exception class to be thrown. Depending upon the unit test type (junit3/4 or testNG), appropriate annotaions will be added to the method. The user can choose to generate a regular test or an exception test. When the user wants to create a regualar test, they can choose to throw an exceptiton -- the test method will throw the exception or get it consumed -- the test method body will be surrounded with try/catch.
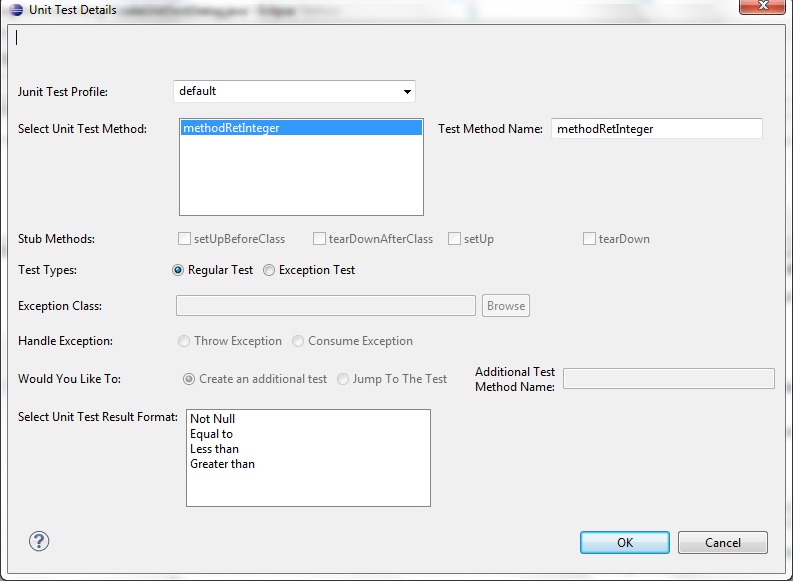
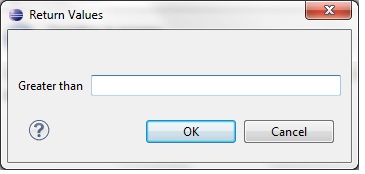
Based on the return type of the method choosen,the result format is listed. The result formats are loaded from resource -> unit-test-result-format.xml. This has templates for "Not Null and not empty", "Equal to", "Greater than", "Less than" etc. For the formats that need a value two more attributes require-value and value-type will be specified. For those formats which need to be validated against any value ie require-value="true", another dialog box will be shown where the user can specify the values. Below is the sample template from the xml.
	<format return-type="int">
		<options>
			<option name="Greater than Zero">
				<![CDATA[
					assertTrue("${result.name} should be greater than zero", ${result.name} > 0);
				]]>
			</option>
			<option name="Less than Zero">
				<![CDATA[
					assertTrue("${result.name} should be less than zero", ${result.name} < 0);
				]]>
			</option>
			<option name="Equal to Zero">
				<![CDATA[
					assertTrue("${result.name} should be equal to zero", ${result.name} == 0);
				]]>
			</option>
			<option name="Equal to" require-value="true" value-type="int">
				<![CDATA[
					assertTrue("${result.name} should be equal to ${value}", ${result.name} == ${value});
				]]>
			</option>
			<option name="Greater than" require-value="true" value-type="int">
				<![CDATA[
					assertTrue("${result.name} should be greater than ${value}", ${result.name} > ${value});
				]]>
			</option>
			<option name="Less than" require-value="true" value-type="int">
				<![CDATA[
					assertTrue("${result.name} should be less than ${value}", ${result.name} < ${value});
				]]>
			</option>
		</options>
	</format>
Below is the sample output for a method with return type integer, format chosen is "Greater Than".
assertTrue("result should be greater than 48", result > 48);
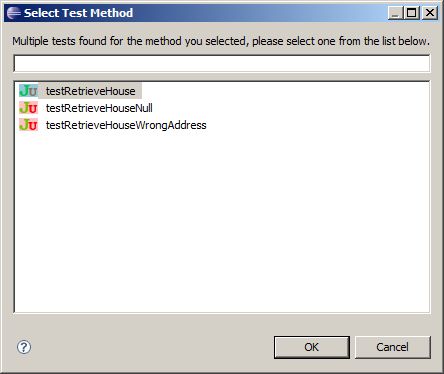
This plugin also provides a way to jump to the unit test. If more than one tests are found, it will show a dialog with all the tests; negative tests (tests that pass if an exception is thrown) are distinguished from positive tests. It also has a way to jump from one junit test to another which are tests for the same method.
To use this feature effectively, one needs to configure it first by going to Windows --> Preferences --> Fast Code Preferences -->Junit Preferences. As shown in the figure below, one cn set up different profiles for different kinds of classes, e.g. DAO classes can have one kind of tests while Service classes can have another. Most of the other fields are pretty much self explanatory.
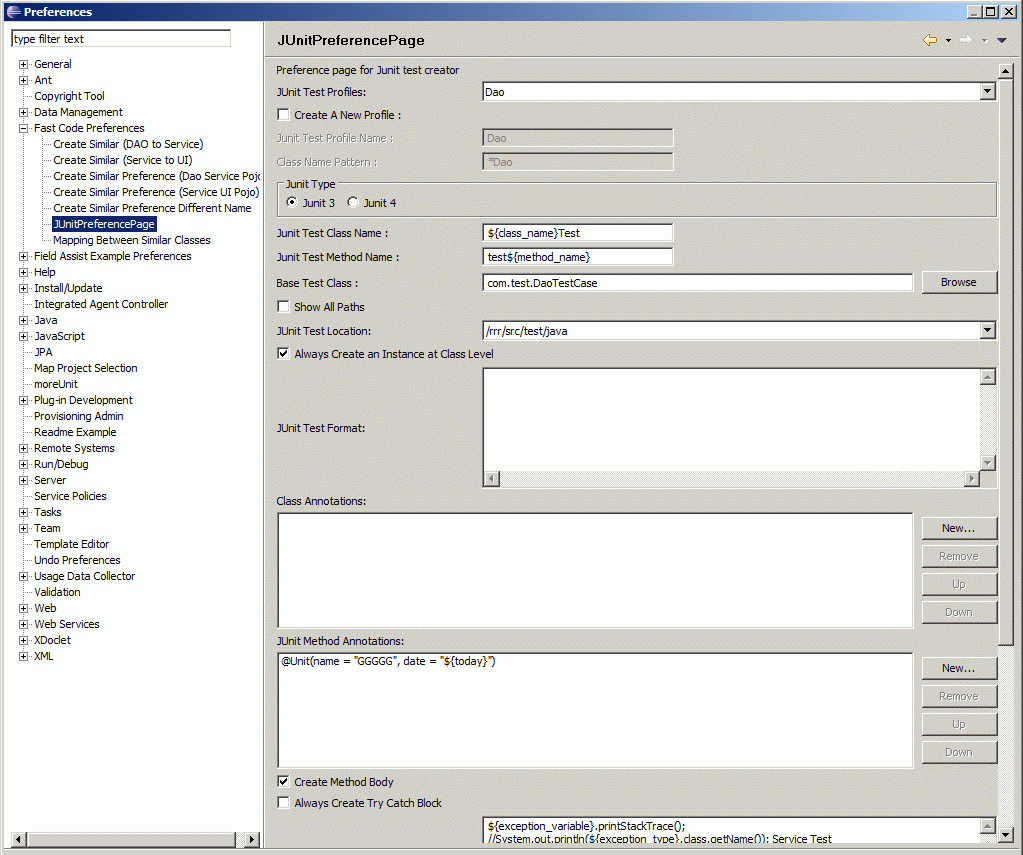
As in the create new class, create unit test also supports predefined code snippets to be inserted inside the test class. As an example, in Junit 4, one can add the following rules before generating the tests in the class body :
- @Rule public TemporaryFolder tempFolder = new TemporaryFolder();
- @Rule public ExpectedException exception = ExpectedException.none();
Junit testss can be created from the implementation classes even if the unit
test is by the interface. In most cases, one needs to create the unit test from
the interface, and next time onwards the implementation class can be used to
create unit tests for other methods from the implementation class. Also Jump to
the unit test can be done from implementation class as well.
Import-Export Unit Test Preference
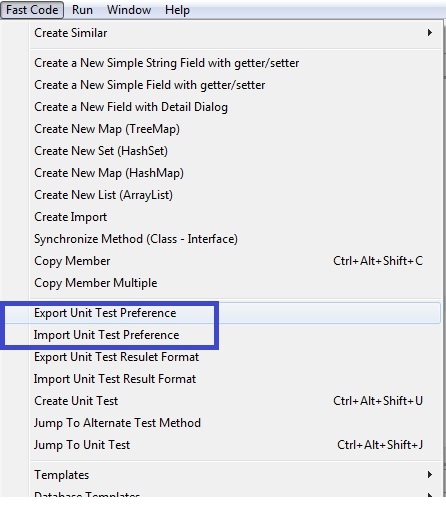
The Unit test prefernce in Windows --> Preferences --> Fast Code Preferences -->Junit Preferences, can be exported to an xml file. The xml can then be edited as required and imported again.
Synchronizing Classes with interfaces
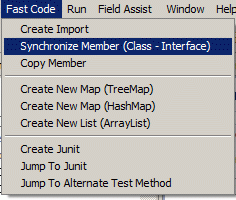
Coding to interfaces is a hallmark of any j2ee projects. This separates the interfaces from implementation, but during development it is tedious to put a method in two places. This is where this plugin can help. One can create a method in the implementation class (e.g. FooServiceImpl) and from the Fast Code menu at the top select Synchronize Member (Class - Interface). If the method is not there in the interface (FooService), it will put it there. Also an option will come up to create Junit test at the same. So one can be just in the implementation class and have all the necessary classes (interface and junit in this case) be modified accordingly.
